Getting to Know Your Sewing Machine
Last time, I introduced you to the two major pieces equipment in the sewing room: the sewing machine and the iron. Now let's take a closer look at the various devices on your machine that control its operation. Just like cars, sewing machines perform the same basic functions, but the means of accessing them will vary by make and model. On a sewing machine, these may take the form of knobs, dials or digital displays. Using your manual as a guideline, locate these major controls:
- On/off switch – controls the power and sometimes the light
- Presser foot lifter – raises the foot to permit positioning the fabric under it
- Reverse lever – allows you to take a few stitches backwards to lock and prevent unraveling of a seam
- Needle thread tension selector – regulates the speed of the unwinding spool of needle thread
- Stitch type selector – offers a choice of stitches, including the utility stitches and some decorative stitches
- Stitch length selector – adjusts the length of straight stitches and the distance between the points of zigzag stitches
- Stitch width selector – adjusts the horizontal swing of zigzag stitches
The utility stitches are the ones we use most. Your manual will have information on adjusting them to suit your project. Most machines offer five utility stitches:
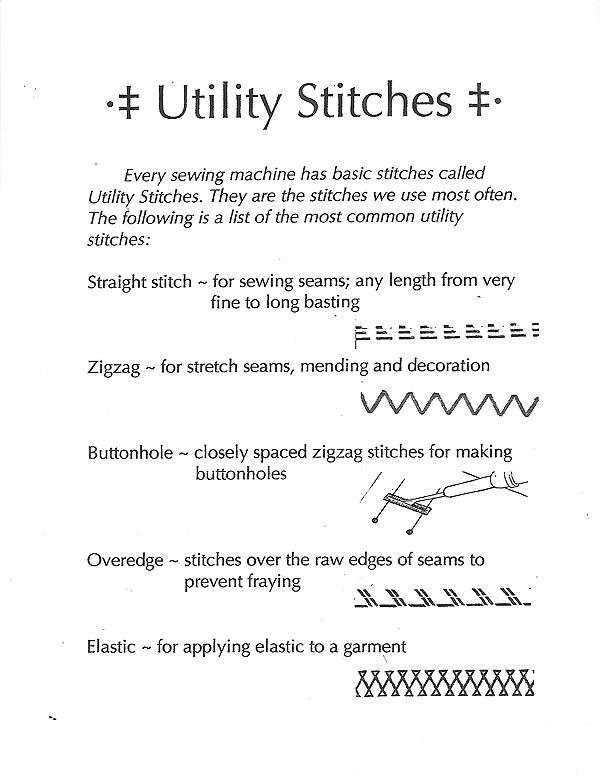
Straight stitch
- This is the workhorse of sewing. It's used to join two pieces of fabric together, and can temporarily hold pieces in place at basting length. With top stitching thread in the needle, it can create beautiful embellishments. The straight stitch has no width, only length. Most machines offer a range of 0-6mm for length.
Zigzag
- This is the stitch that overcasts raveling fabric, appliques edges, makes buttonholes, mends tears, and sews on buttons with the machine, With the feed dogs down, it also allows the sewer to do freestyle embroidery. Zigzag stitches can be adjusted in width (the horizontal side to side movement) and length (the space between the points of the zigzags). Because of the space between the points, this stitch has give and can be used with knits. The three step zigzag is very stretchy.
Overedge stitch
- Fabric edges that fray easily are contained with this stitch. It is a combination of a straight stitch and a type of zigzag stitch. Both the length of the straight stitch and the width of the zigzag stitch can be adjusted depending on the fabric for a custom finish. This stitch preceded the availability of home sergers and is still an excellent way to finish edges.
Honeycomb or elastic stitch
-
The stretchy nature of this stitch makes it a good choice for applying elastic directly to the surface of the fabric. It also does a good job of repairing large mending areas, as long as the fabric is stabilized from behind. Because of the number of movements required of the needle to form this stitch, it will be slower to form than other stitches.
- This is a closely spaced version of the zigzag stitch. It can be adjusted somewhat depending on the machine. When there is no space between the points of the zigzag, it becomes a satin stitch, used in embroidery
Depending on the make of your machine, the stitch length and width adjustments may be metric, decimal, or a combination of both. Try out a variety of settings and make note of them on woven cotton fabric to keep as samples. Always do your samples on two layers of fabric to duplicate a real project. We rarely stitch on one layer of fabric. Have fun experimenting, and practice as often as you can. Even fifteen minutes a day will help you increase your skills and be ready for your first project.